
Thursday, March 25, 2010
Cleaning graph layouts
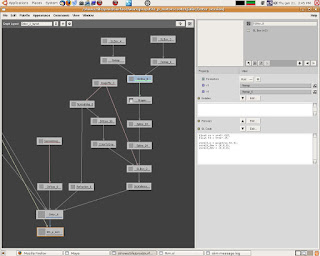
When working in slim and using an auto maya shading group > slim script, slim will generate a graph layout for every node. For me, I like to work with a single graph layout, like in Shake. You could delete the layouts one by one, or you can read on, it'll be slightly different what with all the different pipelines.
Here's my workflow,
1. reference the rigging file
2. save as rig.ma
3. export the maya shaders into slim, it'll generate all the necessary connections, textures > diffuse > delux > ensemble, and a billion layouts.
4. in slim, select all your nodes, thus grouping all the nodes into one graph, and rename the graph to "all"
5. export your slim palette, our company has an auto export script which will export the palette, the attach mel, the meta file, and the aov all at once. If not, you'll have to manually do this part.
6. find your palette, open with text editor, search for layouts, it look something like this,
graphlayouts {
layout Diffuse_layout {
arrangemethod auto
roots 1400_DXwEjq30000
traversemethod upstream
scroll {{} {}}
transforms {1 {0 0}}
}
7. delete all the layouts between graphlayout {} except the one you made, "all".
8. save. open rig.ma, attach the palette.
Friday, March 12, 2010
texture, object, uniform mattes
define AOVs by specifying primvars with the correct type. uniform if its the same color throughout the surface, ie holdout mattes varying if it has different colors through the surface.
primvars
sl
To specify per object mattes would be to use attribute() and match() functions to assign colors to groups or single objects. For example,
sl
So, the above code writes to two mattes, cubes and cones, in which cubeShape10 will be red and cubeShape20 will be green in matte_cubes.
primvars
output varying color matte_name;
sl
extern color matte_name = v1;
result = 0;
To specify per object mattes would be to use attribute() and match() functions to assign colors to groups or single objects. For example,
sl
string xxoo; attribute("identifier:name", xxoo);
if (match("cubeShape10",xxoo))
    extern color matte_cubes = color(r,0,0);
else if (match("cubeShape20", xxoo))
    extern color matte_cubes = color(0,g,0);
else if (match("coneShape30",xxoo))
    extern color matte_cones = color(r,0,0);
So, the above code writes to two mattes, cubes and cones, in which cubeShape10 will be red and cubeShape20 will be green in matte_cubes.
Saturday, February 6, 2010
overriding displacment
sometimes you don't want the specular or reflection component to be affected by bump/displacement, create a vector slbox and plug into the normal of the component
normal nn;
displacement("__Norig",nn);
result = normalize(nn);
Wednesday, February 3, 2010
set SSS bake shading rate
this is for use with sss bake, it sets the bake shading rate to 1 if its less than 0.1, and multiplies it by 5. In most cases, it just means a shading rate of 5.
[ set bakeLevel 5;
set oriShadingRate [mel "mtor control getvalue -rg shadingRate"]
if { $oriShadingRate < 0.1 } { set oriShadingRate 1.0 }
set newShadingRate [expr $oriShadingRate * $bakeLevel ]
if (\$CONTEXT=="BAKECONTEXT") { return "ShadingRate $newShadingRate" }
Thursday, January 28, 2010
building a zdepth shader tree
ingredients,
1. sampler info
2. set range
3. blender
1. connect point camera Z of sampler info to value x of set range.
2. set min/max to 0 and 1, and set old min to distance between camera and furthest point in scene. for example -1000.
3. connect out value x to blender.blender
output the color.
Tuesday, January 19, 2010
desaturating
find the luminance, by separating out the components first, multiply each of the component with luma coefficients(ITUR Rec. 709 ) for RGB respectively. Add them up and mix original image with desaturated image with a matte, in this case a float.
float red = comp(v1,0);
float green = comp(v1,0);
float blue = comp(v1,0);
float luma = .2125*comp(v1, 0) + .7154*comp(v1, 1) + .0721*comp(v1, 2);
result = mix(color(luma),v1,1-v2);
Monday, January 18, 2010
Faking Parallax
Faking parallax is one trick i've learned in videogame texturing, its applicable in non-videogame surfacing as long as it is used in the mid to far background.


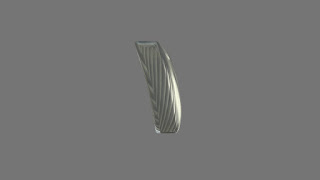 The bulb inside this headlight is created using the above technique, as we turn and look from the side, the bulb will become occluded, achieving a small sense of depth.
 The basic concept is to take the camera normal and use it to offset the UV
normal Ns = normalize(transform("camera", N));
float x = xcomp(Ns);
float y = ycomp(Ns);
float z = zcomp(Ns);
result = x;
the above code is like facing direction, but only in the x direction, make another one for y. Invert y, set a new min/max with remap. The input min/max should be -1 to 1 and the new min/max should be something less than +/-0.25, depends on your texture and how much shift you want. Connect to a manifold slbox with the following snippet,
float ss = s+v3;
float tt = t+v4;
result_Q = point(ss,tt,0);
result_dQu = (0,0,0);
result_dQv = (0,0,0);
where v3 and v4 are the x and y from above.
and then connect to your textures/shapes ST.
You can do this in maya as well, just connect the camera normal from sampler info to uv offset of a place2d node. With a setrange in between, something like that, out of the top of my head.
The basic concept is to take the camera normal and use it to offset the UV
normal Ns = normalize(transform("camera", N));
float x = xcomp(Ns);
float y = ycomp(Ns);
float z = zcomp(Ns);
result = x;
the above code is like facing direction, but only in the x direction, make another one for y. Invert y, set a new min/max with remap. The input min/max should be -1 to 1 and the new min/max should be something less than +/-0.25, depends on your texture and how much shift you want. Connect to a manifold slbox with the following snippet,
float ss = s+v3;
float tt = t+v4;
result_Q = point(ss,tt,0);
result_dQu = (0,0,0);
result_dQv = (0,0,0);
where v3 and v4 are the x and y from above.
and then connect to your textures/shapes ST.
You can do this in maya as well, just connect the camera normal from sampler info to uv offset of a place2d node. With a setrange in between, something like that, out of the top of my head.


 The bulb inside this headlight is created using the above technique, as we turn and look from the side, the bulb will become occluded, achieving a small sense of depth.
 The basic concept is to take the camera normal and use it to offset the UV
normal Ns = normalize(transform("camera", N));
float x = xcomp(Ns);
float y = ycomp(Ns);
float z = zcomp(Ns);
result = x;
the above code is like facing direction, but only in the x direction, make another one for y. Invert y, set a new min/max with remap. The input min/max should be -1 to 1 and the new min/max should be something less than +/-0.25, depends on your texture and how much shift you want. Connect to a manifold slbox with the following snippet,
float ss = s+v3;
float tt = t+v4;
result_Q = point(ss,tt,0);
result_dQu = (0,0,0);
result_dQv = (0,0,0);
where v3 and v4 are the x and y from above.
and then connect to your textures/shapes ST.
You can do this in maya as well, just connect the camera normal from sampler info to uv offset of a place2d node. With a setrange in between, something like that, out of the top of my head.
The basic concept is to take the camera normal and use it to offset the UV
normal Ns = normalize(transform("camera", N));
float x = xcomp(Ns);
float y = ycomp(Ns);
float z = zcomp(Ns);
result = x;
the above code is like facing direction, but only in the x direction, make another one for y. Invert y, set a new min/max with remap. The input min/max should be -1 to 1 and the new min/max should be something less than +/-0.25, depends on your texture and how much shift you want. Connect to a manifold slbox with the following snippet,
float ss = s+v3;
float tt = t+v4;
result_Q = point(ss,tt,0);
result_dQu = (0,0,0);
result_dQv = (0,0,0);
where v3 and v4 are the x and y from above.
and then connect to your textures/shapes ST.
You can do this in maya as well, just connect the camera normal from sampler info to uv offset of a place2d node. With a setrange in between, something like that, out of the top of my head.
Monday, January 4, 2010
Using packages in SLIM to create an RGB splitter
This create a small package that splits colors to RGB or just three outputs with some simple contrast controls.
1. Import a gammaimage

 2. create 3 color slbox and add a color v1 to each of them and add the following code
color red = comp(v1,0);
result = red;
duplicate the code to green and blue substituting 0 with 1 and 2 respectively.
3. create a float spline, and rename the first knot to low, and last knot to high.
4. duplicate the spline and rename the spline to each color. ie red_spline
5. shift select the SLBOX nodes in order of R then G then B. and select the splines in order as well.
6. Right click and click on package.
7. open the package, select red_spline, publish basis, low, p0, high, p1. Do the same for GB.
8. close the package.
This package takes three inputs and has simple contrast controls, it would be great if someone can add the float spline GUI inside the package.
2. create 3 color slbox and add a color v1 to each of them and add the following code
color red = comp(v1,0);
result = red;
duplicate the code to green and blue substituting 0 with 1 and 2 respectively.
3. create a float spline, and rename the first knot to low, and last knot to high.
4. duplicate the spline and rename the spline to each color. ie red_spline
5. shift select the SLBOX nodes in order of R then G then B. and select the splines in order as well.
6. Right click and click on package.
7. open the package, select red_spline, publish basis, low, p0, high, p1. Do the same for GB.
8. close the package.
This package takes three inputs and has simple contrast controls, it would be great if someone can add the float spline GUI inside the package.
2. create 3 color slbox and add a color v1 to each of them and add the following code
color red = comp(v1,0);
result = red;
duplicate the code to green and blue substituting 0 with 1 and 2 respectively.
3. create a float spline, and rename the first knot to low, and last knot to high.
4. duplicate the spline and rename the spline to each color. ie red_spline
5. shift select the SLBOX nodes in order of R then G then B. and select the splines in order as well.
6. Right click and click on package.
7. open the package, select red_spline, publish basis, low, p0, high, p1. Do the same for GB.
8. close the package.
This package takes three inputs and has simple contrast controls, it would be great if someone can add the float spline GUI inside the package.
Thursday, December 17, 2009
Using ptc from colorbleeding
string ptc_file = v1;
normal Nf = faceforward(normalize(N),I);
color IndDif = indirectdiffuse(P,Nf, 0,"filename",ptc_file,"pointbased",1, "maxdist", v2, "falloffmode", 1, "falloff", 1);
result = IndDif*scale;
use in an slbox,
v1,v2,v3 for easier control.
Subscribe to:
Posts (Atom)