Tuesday, March 22, 2011

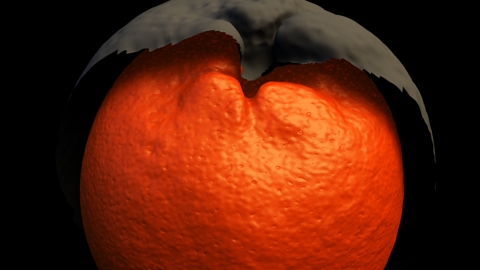
Making an Orange Shader, Shader Exercises

Intro
__________________________________________________________

I'll be making a procedural orange shader, that looks good at closeups. So this is an exercise in procedural noise layering. The main take away here,
  • identifying noise layers/general analysis
  • chaining bump maps
I always start out with references, so here are some,


source

This pretty much has all the properties an orange in detail. I want an extremely red orange, so I will push it even further than the above image.

I can quickly outline some bump noise patterns I can see here,
  • high frequency, ~0.4mm to 0.8mm, these are the cellular bumps and color at extreme close up
  • medium frequency, there are some dimples ~0.5mm to 1mm, but their profile is such that its more visible
  • low frequency, large scale knobbiness of the orange skin, some browning skin patterns
Some notes on the color, sss, and reflection
  • high frequency leathery skin thats even more pronounced in SSS
  • high glossy specularity with color at the end of the falloff
  • to determine the average SSS, look at the light side to dark side fall off. Even 
Bump
__________________________________________________________

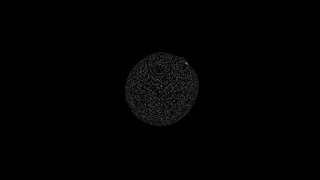
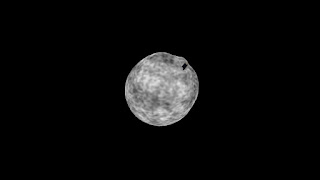
From my noise pattern outline, i quickly created 3 3d textures,
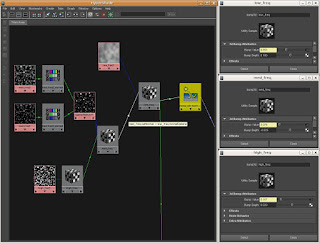
Bump Sub Tree
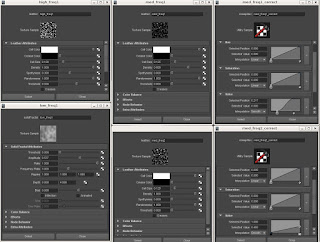
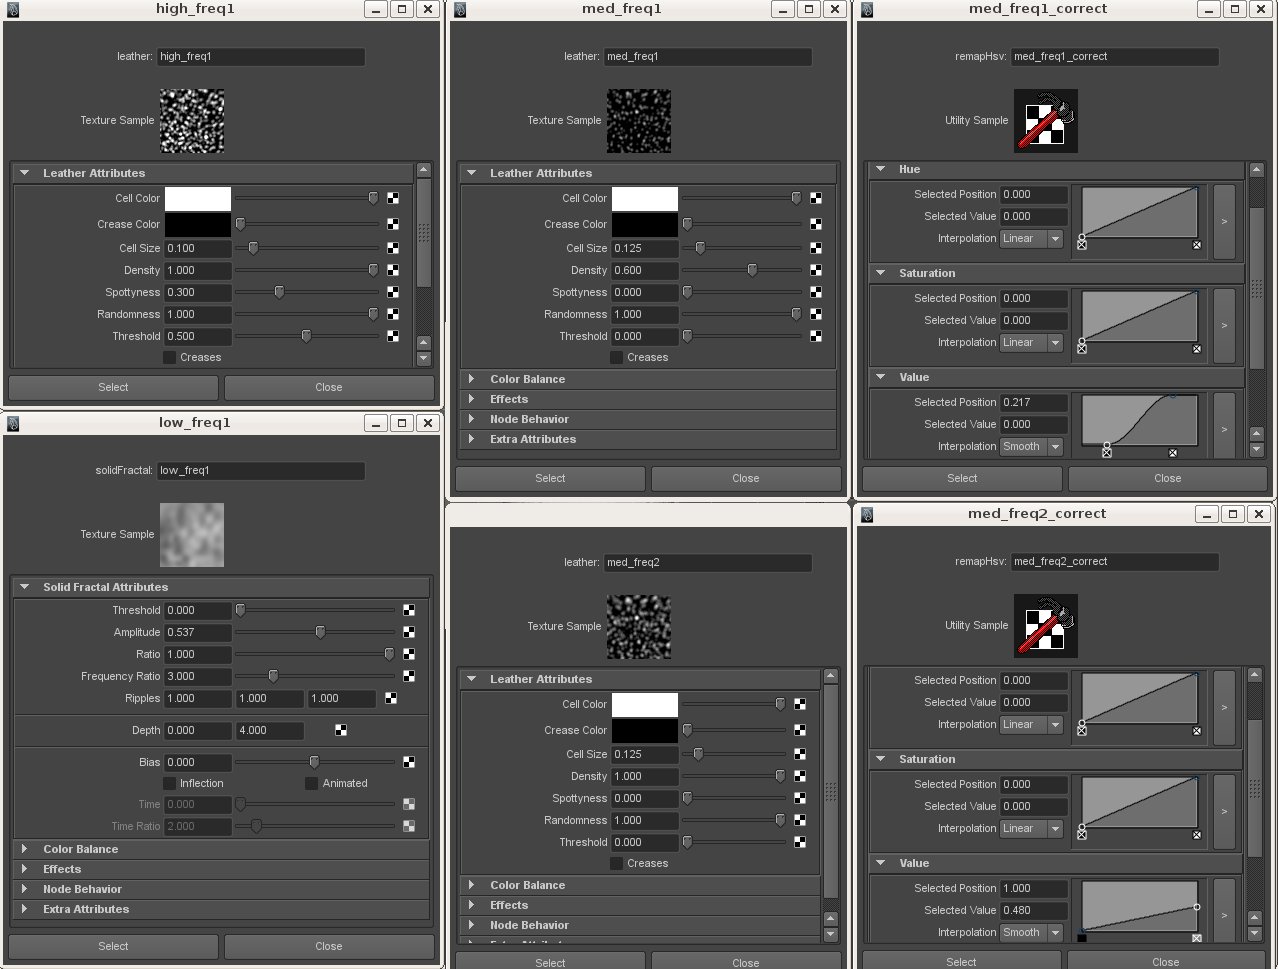
Low, Med, High Freq Map Settings
I used leather 3d texture maps for the high and med freqeuncy maps and a solid fractal 3d map for the low frequency map.
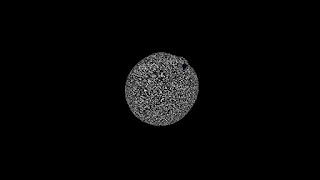

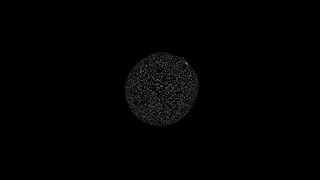
High Frequency Pattern
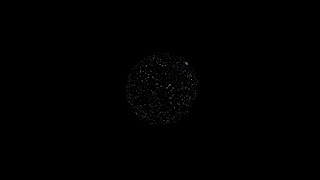
Med. Freq. Pattern 1

Med. Freq. value correct 1
Med. Freq. Pattern 2

Med. Freq. value correct 2

Low Frequency Pattern

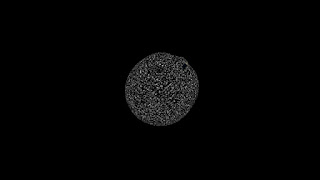
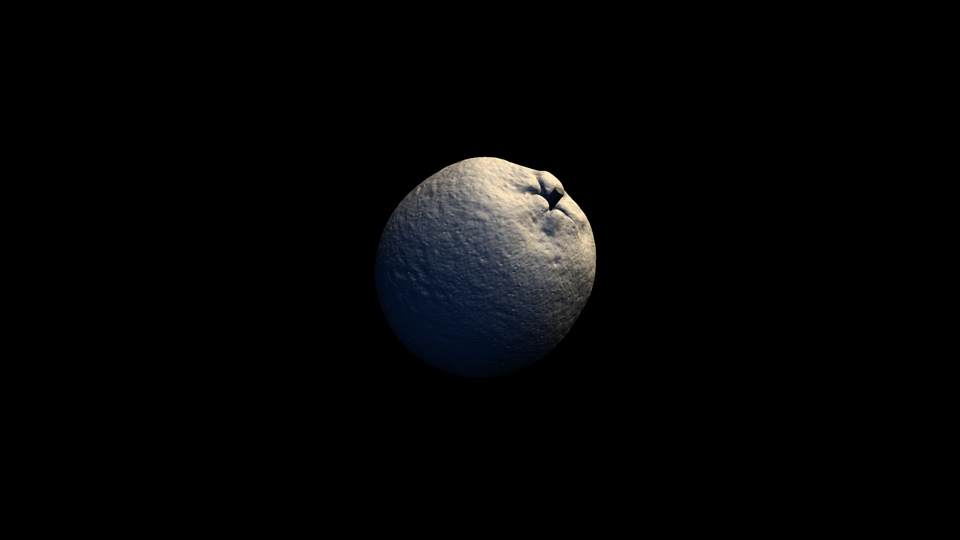
Final bump output
 I tweaked each individual bump pattern separately, determining that the high frequency patterns are small bump, while the medium frequency pattern are sharp holes, and the low frequency patterns are bumps as well. The geometry provided have built in low frequency noise as well. I chained each bumps' outnormal to the next bumps' normal camera to achieve the final bump output.


Diffuse & SSS
__________________________________________________________
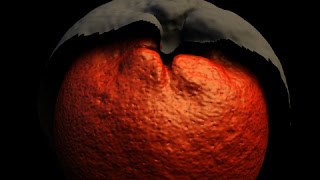

diffuse, spec, bump

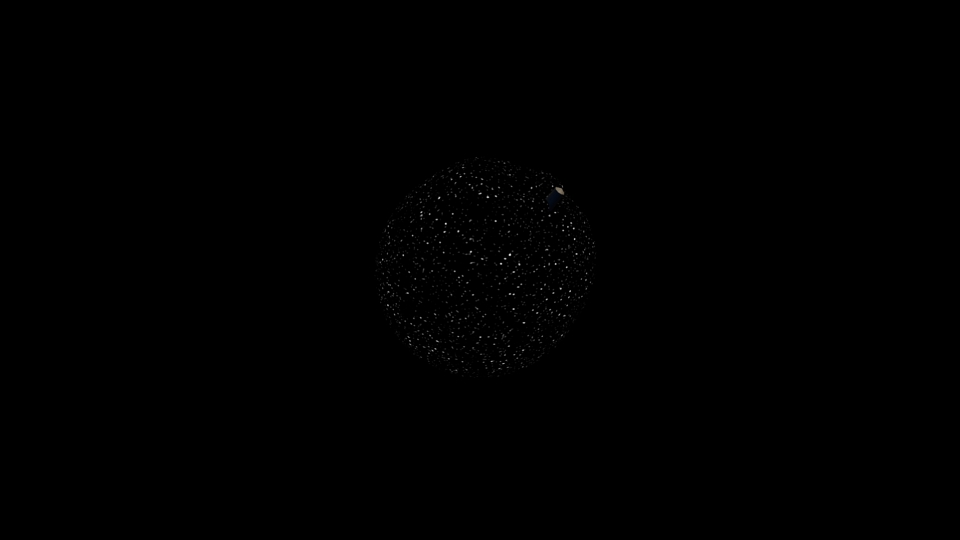
I''ll work on the diffuse and sss at the same time, but first, I duplicated  the orange and scaled it up a little.
The reason being, I need to take a look at the SSS falloff, and for that I need to see how far the SSS penetrates into the shadow side of the orange. Don't worry about how the bump looks so strange, after adding SSS the high contrast washes out. 
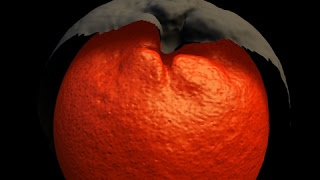
2.0 epidermal radius
For the above render, the epidermal radius is set at 2.0, which washes out any shadows, so i'll set it down to 0.2.
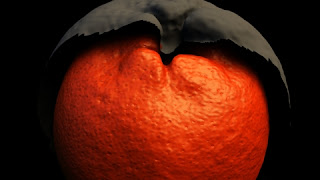
0.2 epidermal radius
This gives the shadow a softer edge and the light penetration is consistent with my reference. 
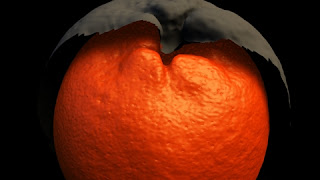
8.0 subdermal radius
The subdermal scatter looks like what I want to achieve, albeit not as intense as I am showing it here. If you shine a flash light, hold it close to the orange, you will discover that at high intensities, the light travels quite far inside the meat, and the skin has these little holes that light penetrates in and out of. Or the holes might not be holes but variations in the thickness of the orange peel. 
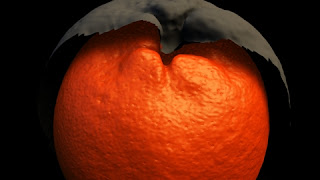
2.0 subdermal radius
Looks about the same, still too far inside the shadows
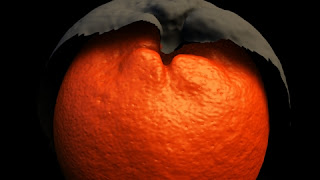
1.0 subdermal radius
Now, for the diffuse color, using a ramp with its built in HSV noise is good enough if the UV seams are hidden well enough. However, the models provided, and a lot of the times, UVs are an afterthought. As a shader artists, 3d procedural textures, custom coded or procedural texture trees(hypershade, slim, mental mill) are preferred.
diffuse on surface shader
Final Shading Tree
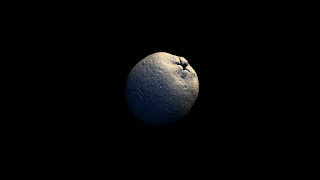
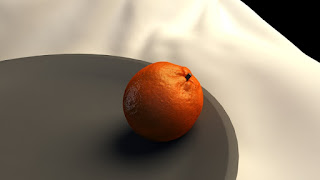
Final Render


Saturday, March 19, 2011

Shader TD and the look development process explained

I found this gem in the CGtalk forums, couldn't have explained it better.

"Well, when you have multiple lighters working on the same sequence, you ideally don't want them to have to tweak the shaders to get the look that they are after. Not only does this take more time (and sometimes break the pipeline if all the shader parameters aren't promoted up to a settable/animatable level), but it also makes it difficult to keep the look consistent among several artists. 

Generally a reference light setup will be made for the show, or for each sequence in a film. The texture artists and look dev artists will make sure the objects look good under those lighting conditions. Then if needed, several variations of the object and/or its shader parameters will be published out for use by the lighting artist. Likewise, a lead lighting artist/TD will generally set up the overall lighting scheme for the set or sequence, and publish that out as well. Then it is up to the individual lighting artists to take the set lighting preset and the surfacing preset, and tweak the lights as needed on a per-shot basis.

Lighters shouldn't be tweaking textures, just like they shouldn't be tweaking geometry. If any texture or shader or geometry problems show up, they should be kicked back as retakes to the appropriate departments. Likewise, lighters shouldn't be tweaking shaders either. Lighters should only be concentrating on the lighting (and often compositing) of the scene. 

Now, I'm not saying that in practice many lighters don't wind up tweaking everything under the sun in order to get their shots to work. They do. They just shouldn't have to. It is messy, often hard to reproduce across multiple shots, and generally a waste of their time."
-MDuffy

Wednesday, March 16, 2011

Making a Grape Shader

Intro
__________________________________________________________


A little about what i'll be trying to achieve with this tutorial,
1. create a grape shader(and other various shaders)
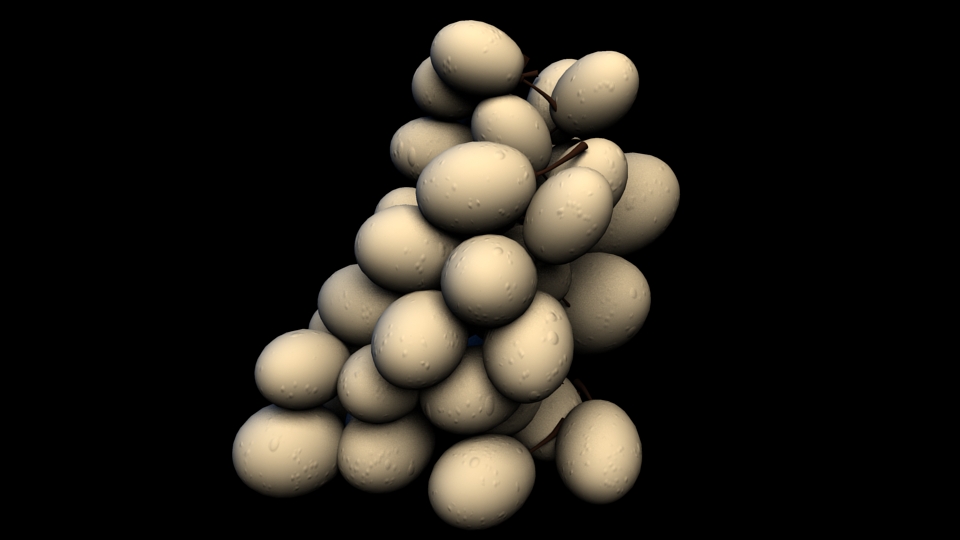
2. create a grape phenomenon shader
3. create presets for the grape shader and adapted to use with cherries.


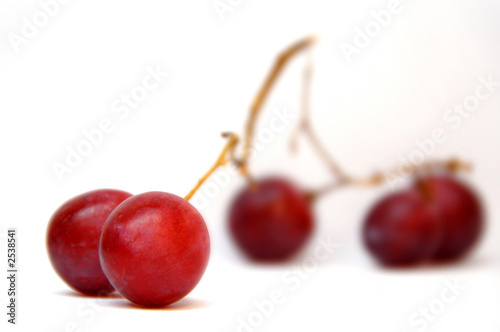
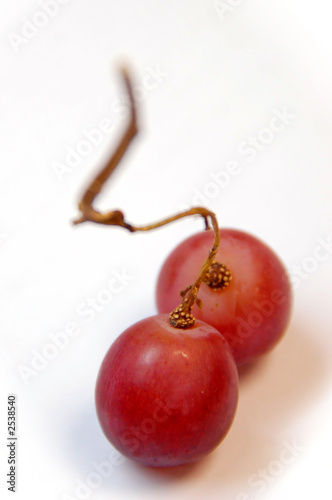
Ok, so we want to make some delicious fruity shaders, seeing theres an available and free fruit platter over at 3drender.com's lighting challenge we'll just start with that. Next up, we'll need to gather some references,


Image 1
HSV range of grapes
Image 2
Image 3
Image 4
Images 5
Images 6


Image 7


There are several varieties of grapes, with hue variations between purple and green. I have decided to proceed with the red/maroon grapes.


From the reference we can start determining the number of layers and shading component this shader would require.

The Basics
__________________________________________________________
  • diffuse
  • reflection
  • specular
  • sss
  • rim
1. in closer examination, the grape skin has some white discoloration to it.
2. the reflection is from the water, and there is a glossy reflection/spec from the skin
3. two layers, the skin and the meat
4. heavy rim effect, combine with reflection fresnel effect


1.Diffuse
__________________________________________________________
One thing to remember is that since we will be adding SSS the diffuse component should be darker than what appears in the photo. Try peeling a grape skin, and flatten it out on the table, that should be the diffuse color component(and even darker than that for effect). There are some white discoloration on the grape skin, from what i read they are molds?. I'll add the effect, but tone it down, so it still looks real, but more appealing.


Diffuse Component Sub Tree


Diffuse Component(on surface shader)
For the white mold i used two 3d textures, a 3d noise and multiply it by a crater to break up the pattern. And for the base, I use a ramp as a solid color, and add small bit of HSV color noise. Breaks up the monotony of solid colors. Add the white mold to the base, but set the alpha of the mold layer to something low. 


Key Settings: 
  • Base color
  • White mold alpha
2. Reflection
__________________________________________________________
Look closely at the reference, particularly images 2 and 6. In image 2, the reflection intensity are higher due to the water. In image 6, we can see the base glossy reflection/specularity. We should also consider whether the white mold has any effect on base glossy reflection/specularity.  Before you start, get a hdr map in there, there are three ways to do this, 
  • Image Based Lighting under render globals
  • mib_lookup_spherical connected to the environment slot in the Shading Goup
  • if theres a slot in the node
I use the second method as its more flexible.


Reflection and Water Reference

I'm aiming for the glossy base reflection of the grape skin first. So I'll put in a mib_glossy_reflection.

Glossy Reflection
Here we have glossy reflection at its default settings(environment color at white), the environment color is really just the intensity(really terrible that Mental Ray lacks consistency across the board). Notice how the area light disappeared, and seems to be a blackhole, not good. Most of the time mib_glossy_reflection will work for me, however, i need to tweak the surface shading normals(ie bump) on my reflection, so i'll use the mia material instead. 


Base MIA Glossy Reflection
For MIA glossy reflection, i set the BDRF curve to 1.0, and 90 degree refl intensity to 0. As I don't want the rim/fresnel effect here. It still shows, however, but neglible. Tweak the glossiness and intensity and turn off everything else. 


Next, for the water, we need to analyse the noise pattern, scale, and frequency of the droplets. So some observations,

  • droplets are ~0.5mm to ~2mm in diameter
  • droplets occur more on the top, and less on the bottom
  • a single large droplet on the bottom, on some grapes.

Droplet Tree

Lrg and Sml Droplet Settings

Mask Settings

I will use the leather 3d texture node for both small and large droplets, and a volume noise for masking out areas for small droplets. Note the remap HSV, both large and small droplet uses the same curve, the curve defines the profile of droplet. 

Droplet bumps
Scale  Y

I'm testing with a lambert shader. Since we're using a 3d texture, connect the map to a 3d bump > misss_normal > mia bump slot. The large drops are too round, so I will scale the Y axis of the placed3d node to simulate the gravity effect on the droplet. I scaled the small droplets the same way, but less. 


Mask

Reflection + Refraction
Base + Droplet
Value Correct

I will turn off the diffuse component and turn on reflection and refraction now. I mapped the noise to an HSV remap to get the contrast and value for reflection and refraction. I corrected the final output with a HSV remap as the hottest highlights are blowing out, and the dark side reflections aren't showing up. 

3. SSS
__________________________________________________________
Looking at the references, we can determine some properties,
  • grape skin, should be similar to the diffuse layer, but brighter.
  • the meat is yellowish, with vein patterns in them
  • the back scattering is yellowish as well, to give that very translucent look
Shading network and settings.
Theres plenty of SSS tutorials out there, so i'll just throw out the settings. I'm using the fast_SSS shader here. The diffuse color goes into the diffuse color slot here as well. Kind of skipping on detail methodology here, but the basic shading principles still apply here, Add noise to everything, and add noise to the noise. 


4. Rim
__________________________________________________________


Rim Tree and Settings
There are light side rims and the dark side rims. Using a sampler info node > ramp(v coord) > lambert(color), i can create the light side rim. I would first invert the ramp, then tweak the ramp for the rim thickness i desire.


the dark side rim would be like this,


A. sampler info > ramp > surface shader(color)
B. sampler info > ramp > lambert(color)


A-B = dark side rim, so use a layered texture and subtract it.


Notes: for B, i would set diffuse to  a value between 1 and 3 to get a thin dark side rim. but anything greater than 1 i would add a Remap HSV and set the high saturation level to inverse of diffuse level. so if diffuse is 3, saturation would be 0.333.
B. sampler info > ramp > lambert(color) > Remap HSV > layered texture.


5. Combining everything
__________________________________________________________


Final Tree
Extreme Closeup
Close Up
Final View


The droplet doesn't hold up that well under extreme closeups, but at that distance, the droplets becomes the focus, and a particle on surface + blobby solution will be better suited for our hero droplet. 


Just before going for the final render, I turned on Final Gather, and I turned on indirect lighting for the lightmap as well. I went back and forth and tweaked the settings, the basic setup is there, however, the difficult part is balancing every aspect of the shader tree and coming to a conclusion on how YOU want it to look like. Sometimes, its easier to just go for a photorealistic look, but sometimes  it looks better placing emphasis on several aspects. In this instance, I upped the SSS, specifically the back SSS, and left the reflection on relatively high. 


Tuesday, August 10, 2010

Shader development notes #1

Very obvious, but needs stating,
1. consistent light rigs across all objects. same key, same fill, same environment map.
2. when developing shaders with SSS, don't use fill lights.

Friday, July 9, 2010

Invader Fractal


Invader Fractal in Mel version 1 Still some squares being left out, but all in all looking good. version 2 Complete, but need to add more size variations version 4 variation 1 Rewrote most of the space filling portion, and added frames etc. variation 2 variation 3 Based on Jared Tarbells Invader Fractal. except done in maya melscript. Below is the space filling portion of the script, using a main grid of 100x50 squares, we go through each one($j), if $j is white, j++, if not, search a random sized area for white squares, if a white square exists, we search random sized area - 1 for white squares and so on until random size = 1 and it must be black due to the first condition. If the random sized area have no white squares, we call the invader_plane()(not shown), which makes the invader plane at that area, and color that particular area white on the main_grid and continue(j++). There are two for loops within the main loop, L loop for going horizontal, which are increments of 50, and the K loop going vertical, which are increments of 1.
------------------------------------------------------------------------------------------------
global proc main_method() {
 undoInfo -state off;
 global int $i;
 int $j, $k, $l, $ex;
 float $vtxPos[];
 string $xyz[];

 for($j = 0; $j < 5000; $j++) {

  print("START----------------------------------------\n");
  $ex = 0;
  select -cl;
  //int $j = 6;
  int $random_size = rand(1,11);
  hilite main_grid;
  for($l = ($random_size - 1) * 50; $l  >= 0; $l = $l - 50){
   string $bah[0] = `listSets -o main_grid.f[$j]`;
   $xyz[0] = $bah[0];
   if ($xyz[0] == "whiteShaderSG") {
  //  print("stopped immediately!!\n");
    $ex = 1;
    continue;
   }   
   for ($k = $random_size - 1; $k >= 0; $k = $k - 1) {
    select -add ("main_grid.f[" + ($j+$k+$l) + "]"); 
    print("K LOOP  ");
    print("main_grid.f[" + ($j+$k+$l) + "]\n" + "$j=" + $j + " $k=" + $k + " $l=" + $l/50 + " size=" + $random_size + "\n");   
    string $bah[0] = `listSets -o main_grid.f[($j + $k + $l)]`;
    if($bah[0] == "whiteShaderSG") {
  //   print("coord " + "random_size="  + $random_size + " k=" + $k + " l/50=" + ($l/50) + "\n"); //coordinate for white square
     int $dif;
     if($k > ($l/50)) {
      print("k larger");
      int $dif;
      for($dif = 0;$dif <= ($random_size - $l/50); $dif++) {
  //     print("dif=" + $dif + " random_size=" + $random_size + " k=" + $k + "\n");
       select -d ("main_grid.f[" + ($j+$k+$l+($dif*50)) + ":" + ($j+$k+$l+$random_size+($dif*50)) + "]");
      }
      for($dif = 0;$dif <= ($random_size - $k); $dif++) {
  //     print("dif=" + $dif + " random_size=" + $random_size + " k=" + $k + "\n");
       select -d ("main_grid.f[" + ($j + ($random_size - $dif) * 50) + ":" + ($j + $random_size + ($random_size - $dif) * 50) + "]");
      }
      $random_size = $k;
     }
     else if($k < ($l/50)) {
      print("l larger");
      $k = 0;
      select -cl;
      $random_size = $l/50;
     }
     else {
      select -cl;
      print("K is equal to L\n\n");
      $random_size = $k;
      $k = 0;
      break;
     }
    }
   }
  print(`ls -sl`);
  print("L LOOP   ");
  print("main_grid.f[" + ($j+$k+$l) + "]\n" + "$j=" + $j + " $k=" + $k + " $l=" + $l/50 + " size=" + $random_size + "\n\n");   
  } 
 if ($ex == 1) {
  continue;
 }
 hilite main_grid;
 sets -e -forceElement whiteShaderSG;
 print(`ls -sl`);           
 polyChipOff -ch 0 -kft 1 -dup 1 -off 0 `ls -sl`;
 polySeparate -ch 0 -n temp main_gridShape;  
 CenterPivot;
 move -r (($random_size/2)*(-1)) ($random_size/2) ($random_size/2) temp1.scalePivot temp1.rotatePivot;     
 select temp temp1;   
 parent -w;   
 select -r main_grid;
 doDelete;
 rename "temp" "main_grid";
 float $vtxPos[3] = `xform -q -ws -t temp1.vtx[0]`;
 select -r temp1;
 doDelete;
 invader_plane;
 ls -sl;
 move -r $vtxPos[0] ($vtxPos[1]+1) $vtxPos[2];
 scale -r ($random_size) ($random_size) ($random_size);
 $i++;
 }
}

------------------------------------------------------------------------------------------------

Tuesday, June 1, 2010

elevation matte

For example, the water line, where the side of a cliff/moutain/hill is washed off and exposes the mud/stone underneath. Or how snow appears at a certain altitude, or timber lines. You can use a measure distance tool to find the min max, and you can choose the coordinate system to find p. Usually world, or object.


point p = transform("object", P);
point maxp = point(0,max,0);
point minp = point(0,min,0);
point offsetp = point(0,offset,0);
result = (ycomp((p+offsetp)/(maxp-minp)));


Then connect to a spline.

Tuesday, May 18, 2010

substrate in rsl, version 3

Happy Mistakes. Not what i wanted, but at least it runs and gives me some interesting results. slbox source

Monday, May 10, 2010

Water droplets on surface

Water droplets on leafs. Its a specular component with displaced shading normal. Some techniques demonstrated here are, 1. adding/modifying displaced shading normal 2. using the shape, and tile node to create the droplets and patterns 3. using shading normal to specify the angle where the droplets would fall away due to gravity. --------------------------------------------------------------------------------------------------------------------
The tree branch of the specular component of the water droplet, remember, its just a component of the leaf surface.It consists of the spec(cook torrance), reflection, and refraction. None of it ray traced, but requires an hdri environment map, for this example, find a map thats green on the bottom, with cool fill light, and warm key. --------------------------------------------------------------------------------------------------------------------
First let us define the shape and pattern of the droplet. We'll use a circle shape node, with a fuzz of 4. Connect to a float spline to define the profile of the droplet, as demonstrated on the left. Use a tile manifold node, where we can adjust the frequency and jitter, and under the manifold of tile, lets warp the ST a little to give it a more irregular look. --------------------------------------------------------------------------------------------------------------------
I also multiply the above with this function, which is that every point thats flat or less than x angle is white, while everything thats steep and greater than x angle is black. Using the dot product between the vector that points in the world y direction and the normal, we get the cosine of the angle. --------------------------------------------------------------------------------------------------------------------
The key to the droplet is here, we displace the point on surface for this specular component by adding the above to p. -------------------------------------------------------------------------------------------------------------------- The rest is pretty straightforward, be sure to mask out the droplet on both the refraction and spec. I also connected "diffuse>colortogray" to the refraction intensity to control the shadow side of the leaf droplet. Otherwise it'll be too bright, on further thought, I probably should do the same to the spec component as a precautionary measure. -------------------------------------------------------------------------------------------------------------------- Note 1: One problem I have encountered is when the leafs are animated, the angle cut off is too sharp, one possible solution is simply to bake in the position of the droplets into a texture. Anything more complex, for example, droplet falling off the leaf would be better dealt with in FX.

Tuesday, May 4, 2010

substrate in rsl, version 2

one main branch to the left, with branching to the right at every point on the main branch. Need to add branching at EVERY iteration.

result = 0;
point stspace = point((scale*s)+offset,(scale*(1-t))+offset,0);
uniform float i,j;
float x[100],y[100],x1[100],y1[100],dx,dy,dx1,dy1,line[100],line1[100],defuzz,newlength,dist,dist1;

point p[100],p1[100];
defuzz = 0;
//initialize first variables
x[0] = vx1;
x[1] = vx2;
y[0] = vy1;
y[1] = vy2;
p[0] = point(x[0],y[0],0);
p[1] = point(x[1],y[1],0);
line[0] = ptlined(p[0],p[1],stspace);
j = 0;
for (i = 1; i <= 1; i += 1) {
 newlength = cellnoise(i)/2;
 dx = x[i]-x[i-1];
 dy = y[i]-y[i-1];
 dist = sqrt(pow(dx,2)+pow(dy,2));
 dx /= dist;  dy /= dist;   //perpendicular points, left
 x[i+1] = x[i] - (newlength/2)*dy;
 y[i+1] = y[i] + (newlength/2)*dx;
 p[i+1] = point(x[i+1],y[i+1],0);
 line[i] = ptlined(p[i],p[i+1],stspace);
 defuzz += 1-smoothstep(width-fuzz,width+fuzz,line[i]);
 for (j = 1; j <= 5; j += 1) {
  newlength = cellnoise(j*i)/2;
  x1[0] = x[i-1];
  x1[1] = x[i];
  y1[0] = y[i-1];
  y1[1] = y[i];
  p1[0] = point(x1[0],y1[0],0);
  p1[1] = point(x1[1],y1[1],0);
  dx1 = x1[j]-x1[j-1];
  dy1 = y1[j]-y1[j-1];
  dist1 = sqrt(pow(dx1,2)+pow(dy1,2));
  dx1 /= dist1;
  dy1 /= dist1;       //perpendicular points, left     
  x1[j+1] = x1[j] + (newlength/2)*dy1;
  y1[j+1] = y1[j] - (newlength/2)*dx1;
  p1[j+1] = point(x1[j+1],y1[j+1],0);
  line1[j] = ptlined(p1[j],p1[j+1],stspace);
  defuzz += 1-smoothstep(width-fuzz,width+fuzz,line1[j]);
  }
 }
result = defuzz;

Monday, May 3, 2010

substrate in rsl, version 1


result = 0;
point stspace = point((scale*s)+offset,(scale*(1-t))+offset,0);
uniform float i;
float x[100],y[100],dx,dy,line[100],defuzz,newlength,dist;
point p[100];
defuzz = 0;
//initialize first variables
x[0] = x1;
x[1] = x2;
y[0] = y1;
y[1] = y2;
p[0] = point(x[0],y[0],0);
p[1] = point(x[1],y[1],0);
line[0] = ptlined(p[0],p[1],stspace);
  
for (i = 1; i <= 98; i += 1) {
 newlength = cellnoise(i);
   
 dx = x[i]-x[i-1];
 dy = y[i]-y[i-1];
 dist = sqrt(pow(dx,2)+pow(dy,2));
 dx /= dist;
 dy /= dist;
   
 //perpendicular points, left and right
 x[i+1] = x[i] - (newlength/2)*dy;
 y[i+1] = y[i] + (newlength/2)*dx;
 p[i+1] = point(x[i+1],y[i+1],0);
   
 line[0] = ptlined(p[0],p[1],stspace);
 line[i] = ptlined(p[i],p[i+1],stspace);
 defuzz += 1-smoothstep(width-fuzz,width+fuzz,line[i]);
 result = defuzz;
 }

Thursday, April 29, 2010

random snippets 01


result = 0;
point stspace = point((scale*s)+offset,(scale*(1-t))+offset,0);
float i;
float x[100],y[100],line[100],defuzz[100];
point p[100]; p[0] = point(.2,.6,0);
for (i=0;i<100;i+=1) {
 x[i] = 2*noise(.5+i);
 y[i] = 2*noise(.5+i+13);     p[i] = point(x[i],y[i],0);
 line[i] = ptlined(p[i],p[i-1],stspace);
 defuzz[i] = 1-smoothstep(width-fuzz,width+fuzz,line[i]);
 result += defuzz[i];
 }

Tuesday, April 20, 2010

desaturating individual color components


result = 0;
float r = comp(v1,0); 
float g = comp(v1,1); 
float b = comp(v1,2);
float lumr = .2125*comp(v1,0);
float lumg = .7154*comp(v1,1);
float lumb = .0721*comp(v1,2);
color desatr = mix(color(lumr), color(r,0,0), saturationr);
color desatg = mix(color(lumg), color(0,g,0), saturationg);
color desatb = mix(color(lumb), color(0,0,b), saturationb);
result = desatr+desatg+desatb;

Friday, April 16, 2010

Graphearea, color coding shaders

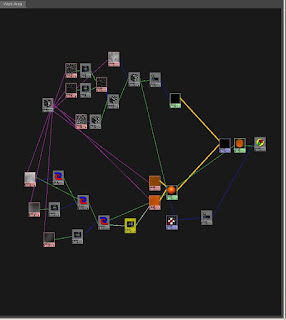
laying out a typical shader. In this example is a character with clothes and some accessories. The blue nodes are AOV nodes(as in bluescreen mattes, get it?), the green nodes are control mattes. The red nodes are global control nodes, occ. Yellow are ensembles, and purple are unused. If there's a way to define our own custom colors, please share.

Wednesday, April 7, 2010

shading normals

straight from Renderman pro server documentation,


P += normalize(N) * a * amplitude;t a;
P = transform("object", P);
N = transform("object", N + point "object" (0,0,0));
P = transform("object", "current", P);
N = calculatenormal(P);


with some errors in the above code, we can use this in a vector slbox to slightly alter the shading normal which we can then plug into a shading component(specular and reflection). say we want to break up the specular reflection of specular to make it look like water droplets on skin. we use the above code, use a fractal for "a", create our own point p and normal n, and normalize the final n. It'll look like this,


point p = transform("object", P);
normal n = transform("object", N + point "object" (0,0,0));
p += normalize(n) * a * amplitude;
p = transform("object", "current", p);
n = calculatenormal(p);
result = normalize(n);


The addition of point "shader" (0,0,0) in the second line accounts for the fact that N is really a vector (or normal), and thus should not transform in the same way as a point.
This is the old way of transforming vectors and normals. These days, we encourage you to use the following equivalent (but less confusing and cheaper!) construct:
normal Nsh; Nsh = ntransform ("shader", N); For vectors (as opposed to normals), one should use the vtransform function.